Creating forms is part of the day to day live of a Drupal programmer. Forms are represented as nested arrays in both Drupal 7 and Drupal 8. But they are different in that in Drupal 7 you define your form arrays in functions and in Drupal 8 you create a form class.
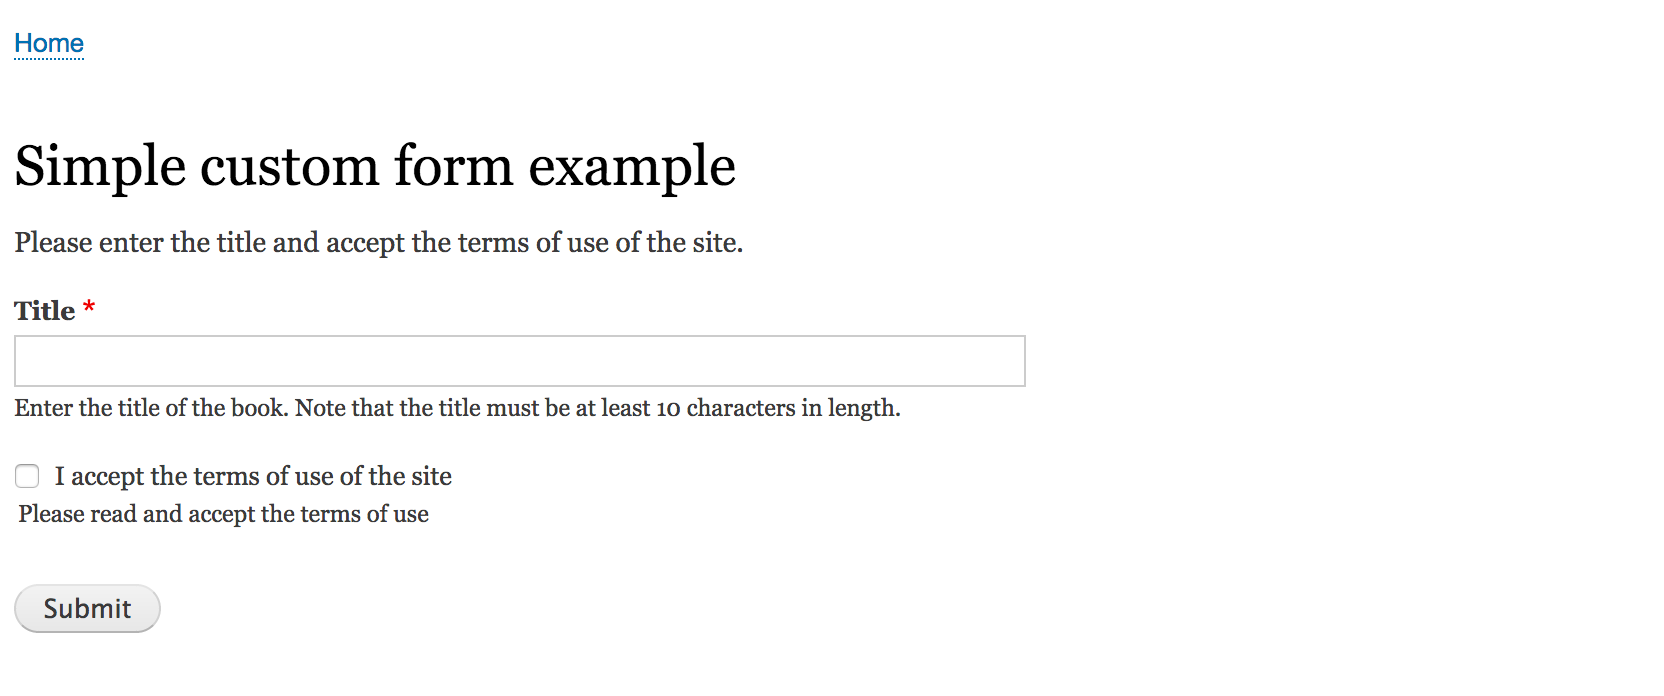
In this post we’ll create a custom form with two fields, a text field and a checkbox field, we’ll validate those fields, display them in a message and finally redirect the user to the home page.
You can find the code of this module here.
Here is a screenshot of the form:
You can see the folder structure of this module below:
web/modules/custom/ex81
|-- ex81.info.yml
|-- ex81.routing.yml
`-- src
    `-- Form
        `-- HelloForm.php

2 directories, 3 files
First we’ll create the form step by step manually, then we’ll use Drupal Console to do it in a easier way.
1. Create the module’s skeleton
2. Create the form’s class and assign a name to the form
3. Build the form
4. Validate the form
5. Process the collected values
6. Add a route to your form
7. Do it easier with Drupal Console
In Drupal 8, each form is defined by a controller class that implements the interface \Drupal\Core\Form\FormInterface which defines four basic methods:
getFormId() - Defines the unique ID for the form
buildForm() - Triggered when the user requests the form. Builds the basic $form array with all the fields of the form.
validateForm() - Triggered when the form is submitted. It’s used to check the values collected by the form and optionally raise errors.
submitForm() - Used to carry out the form submission process, if the form has passed validation with no errors.
1. Create the module’s skeleton
As always, we use the Drupal Console to create the module. Don’t forget to install the module after it has been generated.
We use the following command:
drupal generate:module  --module="ex81" \
--machine-name="ex81" \
--module-path="modules/custom" \
--description="Example of a simple custom form" \
--core="8.x" \
--package="Custom" \
--uri="http://default" \
--no-interaction
Once created we can install it with drupal module:install ex81 command
2. Create the form’s class
We create a new php file called HelloForm.php in the src/Form folder. In this file we create a new class called HelloForm that extends the abstract class FormBase (which implements the FormInterface interface).
In this class we create the getformId() method to set a unique string identifying the form.
<?php

namespace Drupal\ex81\Form;

use Drupal\Core\Form\FormBase;
use Drupal\Core\Form\FormStateInterface;

class HelloForm extends FormBase {

  /**
   * Returns a unique string identifying the form.
   *
   * The returned ID should be a unique string that can be a valid PHP function
   * name, since it's used in hook implementation names such as
   * hook_form_FORM_ID_alter().
   *
   * @return string
   *   The unique string identifying the form.
   */
  public function getFormId() {
    return 'ex81_hello_form';
  }

}
3. Build the form
Now we add to this class a new method called buildForm() which defines the text and the checkbox fields of our form. We also add a field description to add a small message on top of the form.
At the end of the method we add a submit field and return the form array.
  /**
   * Form constructor.
   *
   * @param array $form
   *   An associative array containing the structure of the form.
   * @param \Drupal\Core\Form\FormStateInterface $form_state
   *   The current state of the form.
   *
   * @return array
   *   The form structure.
   */
  public function buildForm(array $form, FormStateInterface $form_state) {

    $form['description'] = [
      '#type' => 'item',
      '#markup' => $this->t('Please enter the title and accept the terms of use of the site.'),
    ];


$form['title'] = [
      '#type' => 'textfield',
      '#title' => $this->t('Title'),
      '#description' => $this->t('Enter the title of the book. Note that the title must be at least 10 characters in length.'),
      '#required' => TRUE,
    ];

    $form['accept'] = array(
      '#type' => 'checkbox',
      '#title' => $this
        ->t('I accept the terms of use of the site'),
      '#description' => $this->t('Please read and accept the terms of use'),
    );


    // Group submit handlers in an actions element with a key of "actions" so
    // that it gets styled correctly, and so that other modules may add actions
    // to the form. This is not required, but is convention.
    $form['actions'] = [
      '#type' => 'actions',
    ];

    // Add a submit button that handles the submission of the form.
    $form['actions']['submit'] = [
      '#type' => 'submit',
      '#value' => $this->t('Submit'),
    ];

    return $form;

  }
4. Validate the form
To validate the form we just need to implement the validateForm() method from \Drupal\Core\Form\FormInterface in our HelloForm class.
In our example we’ll raise an error if the length of the title is less than 10 and also if the checkbox is not checked. User-submitted values can be accessed via $form_state->getValue('key') where "key" is the name of the element whose value we would like to retrieve.
We raise an error thanks to the setErrorByName() method of the $form_state object.
  /**
   * Validate the title and the checkbox of the form
   *
   * @param array $form
   * @param \Drupal\Core\Form\FormStateInterface $form_state
   *
   */
  public function validateForm(array &$form, FormStateInterface $form_state) {
    parent::validateForm($form, $form_state);

    $title = $form_state->getValue('title');
    $accept = $form_state->getValue('accept');

    if (strlen($title) < 10) {
      // Set an error for the form element with a key of "title".
      $form_state->setErrorByName('title', $this->t('The title must be at least 10 characters long.'));
    }

    if (empty($accept)){
      // Set an error for the form element with a key of "accept".
      $form_state->setErrorByName('accept', $this->t('You must accept the terms of use to continue'));
    }

  }
5. Process the collected values
Now it’s time to process the values collected by our form. We do this with the submitForm() submission handler method.
Here we can save the data to the database, send them to an external API or use them in a service. In our case we’ll just display those values and redirect the user to the home page. To redirect the user, we’ll use the setRedirect() method of the $form_state object.
Remember that if you need to save those values in the config system, you should extend the ConfigFormBase as we saw earlier in another post.
  /**
   * Form submission handler.
   *
   * @param array $form
   *   An associative array containing the structure of the form.
   * @param \Drupal\Core\Form\FormStateInterface $form_state
   *   The current state of the form.
   */
  public function submitForm(array &$form, FormStateInterface $form_state) {

    // Display the results.

    // Call the Static Service Container wrapper
    // We should inject the messenger service, but its beyond the scope of this example.
    $messenger = \Drupal::messenger();
    $messenger->addMessage('Title: '.$form_state->getValue('title'));
    $messenger->addMessage('Accept: '.$form_state->getValue('accept'));

    // Redirect to home
    $form_state->setRedirect('<front>');

  }
6. Add a route to your form
Now that we have added a controller to your custom module, we are almost done. The last thing is to add a route in our routine file in order to allow users to access our form.
If we haven’t created this file before, we create the ex81.routing.yml file in the root of the module. In this file we add the route that points to the form controller (HelloForm) we created above. In this case we won’t be using the _controller key, but the _form key, so Drupal will use the form builder service when serving this request.
ex81.hello_form:
  path: '/ex81/helloform'
  defaults:
    _form: 'Drupal\ex81\Form\HelloForm'
    _title: 'Simple custom form example'
  requirements:
    _permission: 'access content'
The above code adds a route that maps the path /ex81/helloform to our form controller Drupal\ex81\Form\HelloForm.
Now we can navigate to our form and test it!
Recap.
1. We created the module with the Drupal Console command: drupal generate:module
2. We created the form controller class HelloForm in the src\Form folder. This class extends the abstract class FormBase that implements the interface FormInterface.
3. We set a unique string ID for our form with the getFormId() method.
4. We defined the fields of the form with the buildForm() method.
5. To validate the form, we used the validateForm() method and use the setErrorByName() method of the $form_state object.
6. We processed the values of the form with the submitForm() method and redirect the user to the home page with the setRedirect() method of the $form_state object.
7. We created a route that points to our form using the specific key _form
7. Bonus: Create a custom form with Drupal Console
We’ll create the same form as above but in another module called 'ex82'.
drupal generate:module  --module="ex81" \
--machine-name="ex81" \
--module-path="modules/custom" \
--description="Example of a simple custom form" \
--core="8.x" \
--package="Custom" \
--uri="http://default" \
--no-interaction
Now we’ll create the form with a simple Drupal Console command: drupal generate:form
drupal generate:form  \
--module="ex82" \
--class="HelloForm" \
--form-id="ex82_hello_form" \
--services='messenger' \
--inputs='"name":"description", "type":"item", "label":"Description", "options":"", "description":"Please enter the title and accept the terms of use of the site.", "maxlength":"", "size":"", "default_value":"", "weight":"0", "fieldset":""' \
--inputs='"name":"title", "type":"textfield", "label":"Title", "options":"", "description":"Enter the title of the book. Note that the title must be at least 10 characters in length.", "maxlength":"64", "size":"64", "default_value":"", "weight":"0", "fieldset":""' \
--inputs='"name":"accept", "type":"checkbox", "label":"I accept the terms of use of the site", "options":"", "description":"Please read and accept the terms of use", "maxlength":"", "size":"", "default_value":"", "weight":"0", "fieldset":""' \
--path="/ex82/helloform" \
--uri="http://default" \
--no-interaction
This will generate two files, HelloForm.php and ex82.routing.yml, as you can see Drupal Console generate almost the entire form.
Let’s take a look at the new generated HelloForm.php
<?php

namespace Drupal\ex82\Form;

use Drupal\Core\Form\FormBase;
use Drupal\Core\Form\FormStateInterface;
use Symfony\Component\DependencyInjection\ContainerInterface;
use Drupal\Core\Messenger\MessengerInterface;

/**
 * Class HelloForm.
 */
class HelloForm extends FormBase {

  /**
   * Drupal\Core\Messenger\MessengerInterface definition.
   *
   * @var \Drupal\Core\Messenger\MessengerInterface
   */
  protected $messenger;
  /**
   * Constructs a new HelloForm object.
   */
  public function __construct(
    MessengerInterface $messenger
  ) {
    $this->messenger = $messenger;
  }

  public static function create(ContainerInterface $container) {
    return new static(
      $container->get('messenger')
    );
  }


  /**
   * {@inheritdoc}
   */
  public function getFormId() {
    return 'ex82_hello_form';
  }

  /**
   * {@inheritdoc}
   */
  public function buildForm(array $form, FormStateInterface $form_state) {
    $form['description'] = [
      '#type' => 'item',
      '#title' => $this->t('Description'),
      '#description' => $this->t('Please enter the title and accept the terms of use of the site.'),
    ];
    $form['title'] = [
      '#type' => 'textfield',
      '#title' => $this->t('Title'),
      '#description' => $this->t('Enter the title of the book. Note that the title must be at least 10 characters in length.'),
      '#maxlength' => 64,
      '#size' => 64,
    ];
    $form['accept'] = [
      '#type' => 'checkbox',
      '#title' => $this->t('I accept the terms of use of the site'),
      '#description' => $this->t('Please read and accept the terms of use'),
    ];
    $form['submit'] = [
      '#type' => 'submit',
      '#value' => $this->t('Submit'),
    ];

    return $form;
  }

  /**
   * {@inheritdoc}
   */
  public function validateForm(array &$form, FormStateInterface $form_state) {
    parent::validateForm($form, $form_state);
  }

  /**
   * {@inheritdoc}
   */
  public function submitForm(array &$form, FormStateInterface $form_state) {
    // Display result.
    foreach ($form_state->getValues() as $key => $value) {
      drupal_set_message($key . ': ' . $value);
    }

  }

}
First you can see that we voluntary inject the messenger service in the Drupal Console command, this allows us to avoid calling the Static Service Container wrapper \Drupal::messenger(). We’ll use it in the buildForm() method later.
Now, we’ll need to add the code for the validation and the submit process with:
- validateForm() method
- submitForm() method
You can copy the same code of the validateForm() method described above in this post in the section 4.
  public function validateForm(array &$form, FormStateInterface $form_state) {
    parent::validateForm($form, $form_state);

    $title = $form_state->getValue('title');
    $accept = $form_state->getValue('accept');

    if (strlen($title) < 10) {
      // Set an error for the form element with a key of "title".
      $form_state->setErrorByName('title', $this->t('The title must be at least 10 characters long.'));
    }

    if (empty($accept)){
      // Set an error for the form element with a key of "accept".
      $form_state->setErrorByName('accept', $this->t('You must accept the terms of use to continue'));
    }

  }
For the buildForm() method we’ll use the same code as above but with a small change since we injected the messenger service
 public function submitForm(array &$form, FormStateInterface $form_state) {

    $this->messenger->addMessage('Title: '.$form_state->getValue('title'));
    $this->messenger->addMessage('Accept: '.$form_state->getValue('accept'));

    // Redirect to home
    $form_state->setRedirect('<front>');
    return;
  }
As simple as that. YES! Drupal Console is definitively a great tool to create custom forms!!!